Front Shock Absorber Removal & Disassembly
NOTE: THIS GUIDE IS STILL IN PROGRESS!
This is my guide to removing the front shock absorbers so that I could replace the rubber boots and bump stops in them. I have Bilstein shock absorbers on my 1990 Eunos Roadster.
Most of the guides I have read have said you should jack the whole car up at the rear and put it on axle stands. My view is that this job is much easier if you do one side at a time and use a trolley jack. The trolley jack allows you to do some useful things to make this job much easier, as you will see later.
Note that in the pictures below I have already removed the boot carpet as my car is a 'stripped out' track day car.
Tools Required
- Breaker bar
- Spanners (14mm)
- Spring compressors
- Torque wrench
- Trolley jack
- Trolley jack adaptor
- Wheel chocks
- Wooden blocks
- Socket set (14mm, 17mm, 21mm x 2)
Parts & Consumables Required
- Shock absorber boots and bumps stops
- Grease
- Replacement nuts and bolts as required.
Initial Jobs

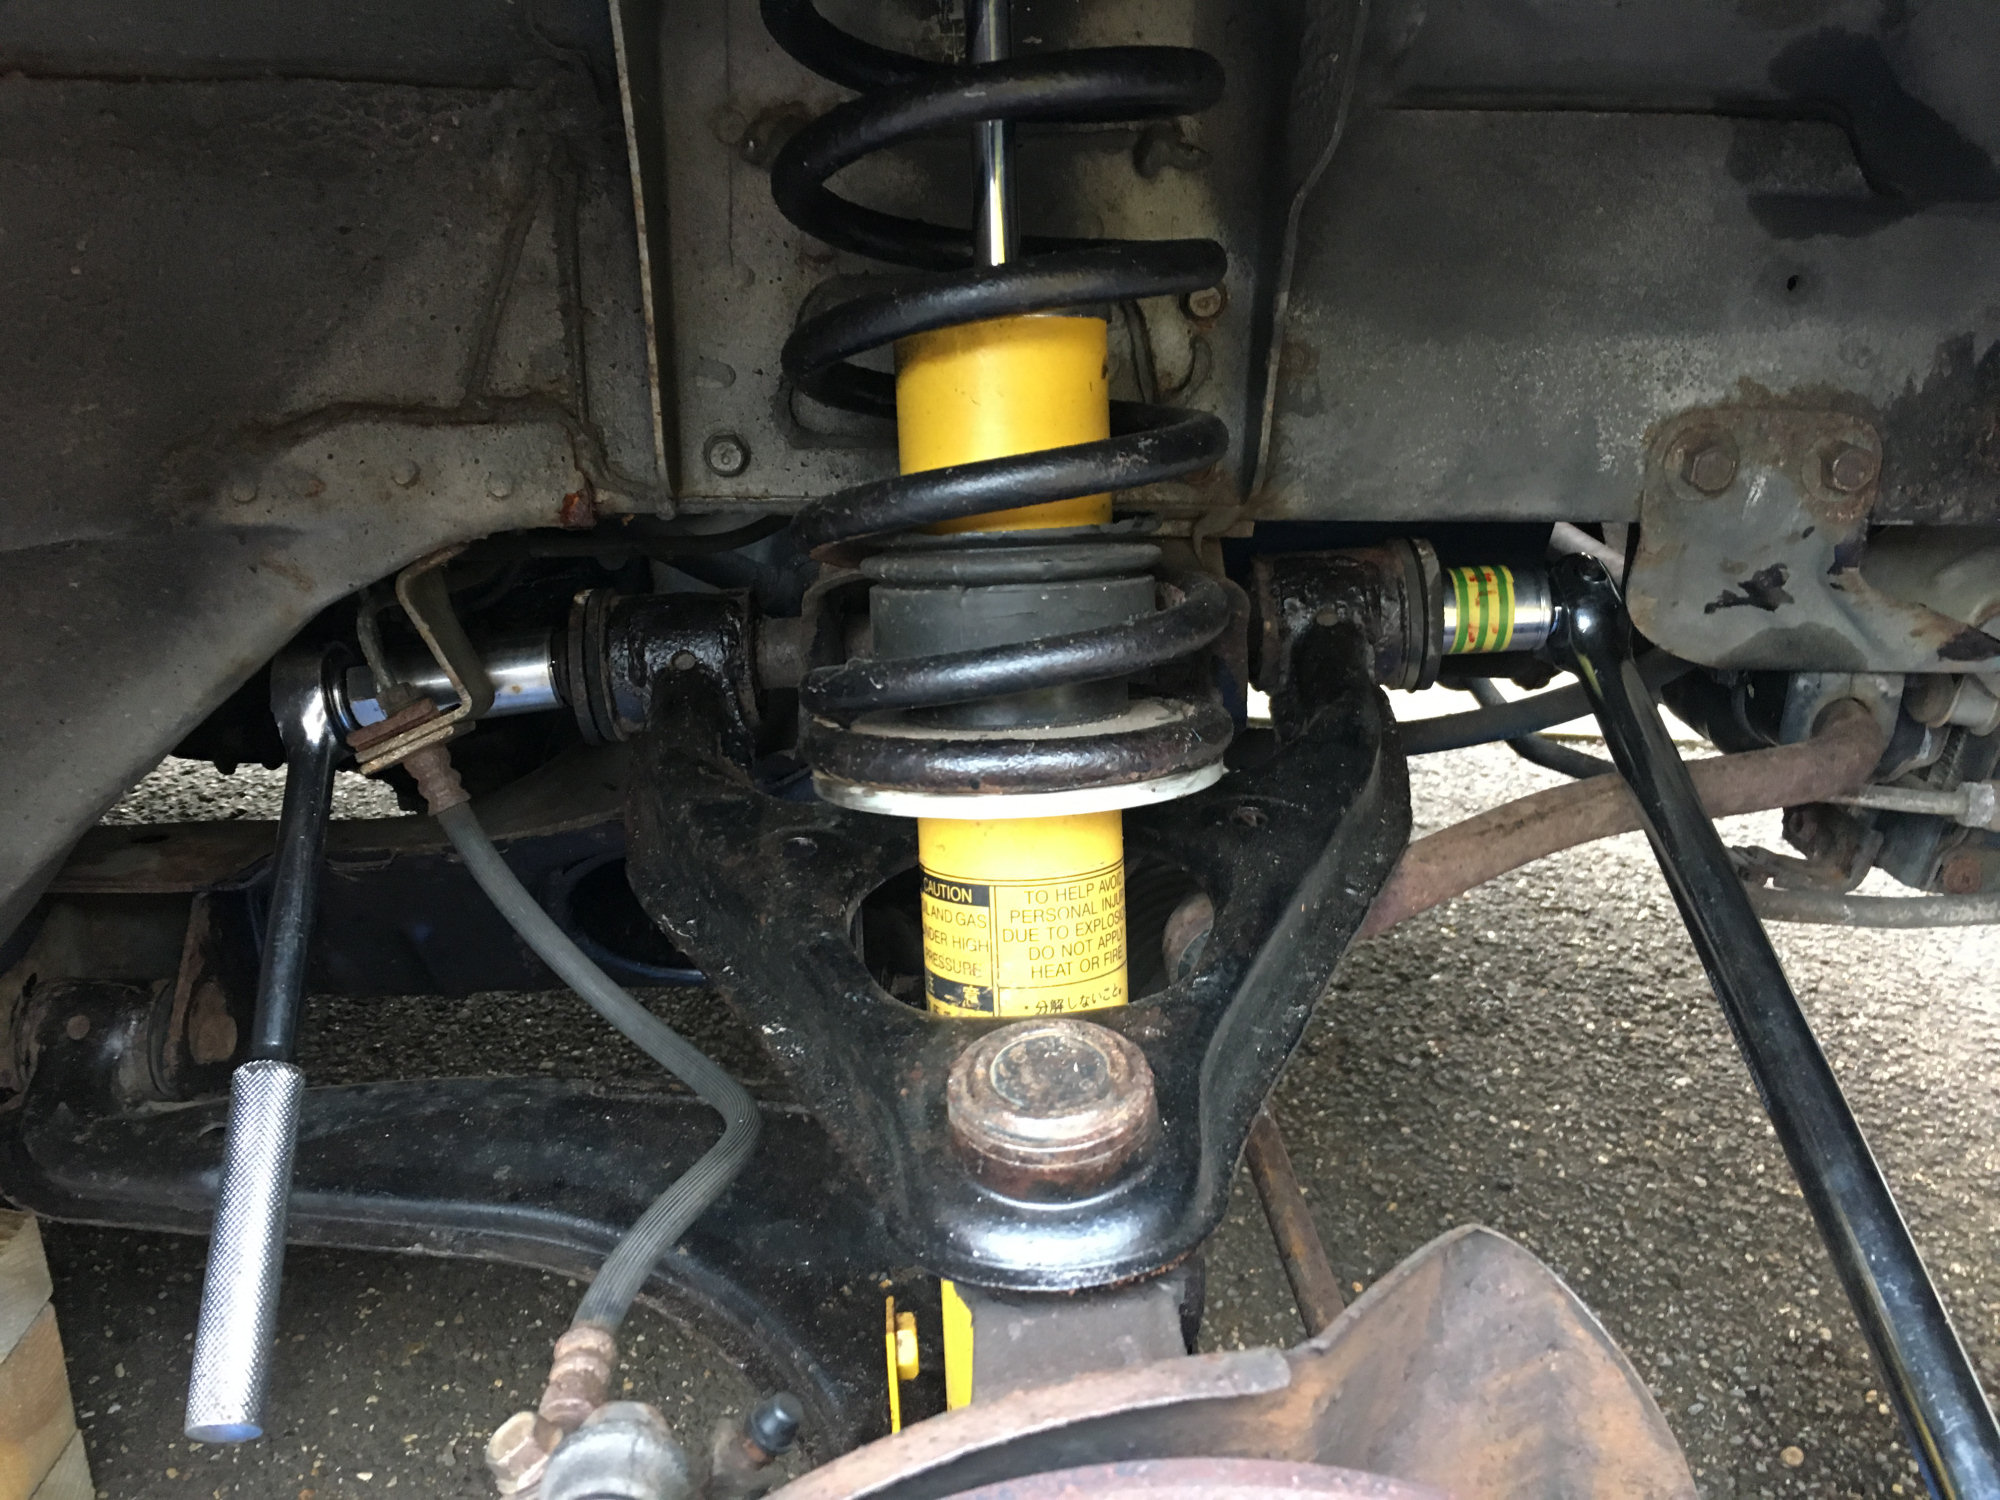
| Before you start this work, you need to disconnect the anti-roll bar on both sides. The easiest way to do this is by removing the lower 'dog bone' connector linking the anti-roll bar to the lower 'A' arm. If you don't do this the upper A-arms will foul the anti-roll bar, making it very hard to extract the shock absorber. The bolt and nut are 14mm. The lower bolts are fitted to my car with the bolt head facing forward. This doesn't make much sense because the steering rack arms make it hard to get the bolt out. It's a lot easier if they are facing the other way! |
I also have a front strut brace fitted to my car and the mounts for this are held in place by the shock absorber top bolts, so this was removed. This makes access easier and we took this opportunity to clean up the strut brace mounts too. This was done with an 8mm Allen key and a 14mm spanner.
Right Side
I started with the front right shock absorber but it doesn't really matter which side you do first.
Loosen the centre nut a few turns to make it easier to take the shock absorber apart later. DO NOT REMOVE THIS NUT! The shock absorber is under a lot of compression and removing this nut will cause it to explode apart. Because this nut is on the end of quite along threaded bolt, you need a deep 14mm socket to get a proper grip on it. Use one that it too shallow and you could round off the nut.

| Remove the two outer nuts so that the shock absorber can be removed later. |
Loosen the wheel nuts slightly, to make it easier to remove the wheel. Raise the front right of the car with the trolley jack and trolley jack adaptor and remove the wheel.
Using a 17mm socket, undo and remove the lower shock absorber bolt. It will be quite tight and you may need to use a breaker bar intially.
With these bolts removed, you won't have enough movement or room to remove the shock absorber yet. The whole in the upper A-arm (as shown below) does not provide enough movement of the shock absorber to take it out.
| The best way to get the required movement is to remove in long inner bolt holding the upper A-arm in place. This is a challenge as it will be very tight and there is limited access to the nut, due to the brake pipe/hose mount. We had to use a breaker bar with a 21mm socket to get it undone. You will also need another 21mm socket on the bolt head end to stop the bolt rotating. The nut is at the rear of the car (the above image shows the breaker bar at the bolt head end as we have loosened it enough to use the shorter ratchet socket bar). With the nut removed, I had to tap it out with a drift and hammer. The is a space between the sub-frame mounts to do this. It didn't need much force to move them on my car. |

| With the long bolt removed the upper A-arm can be pulled outwards to allow the shock absorber to tilt outwards at the top and to be lifted out. |
Removed Shock
On our 1990 Eunos the front shocks were a bit of a state. The rubber boots were in pieces, the springs appear to have been sprayed black at some point. The Bilstein shock absorber is a bit rusty in places. Firstly we need to get it apart to replace the rubber boot and lower bush.
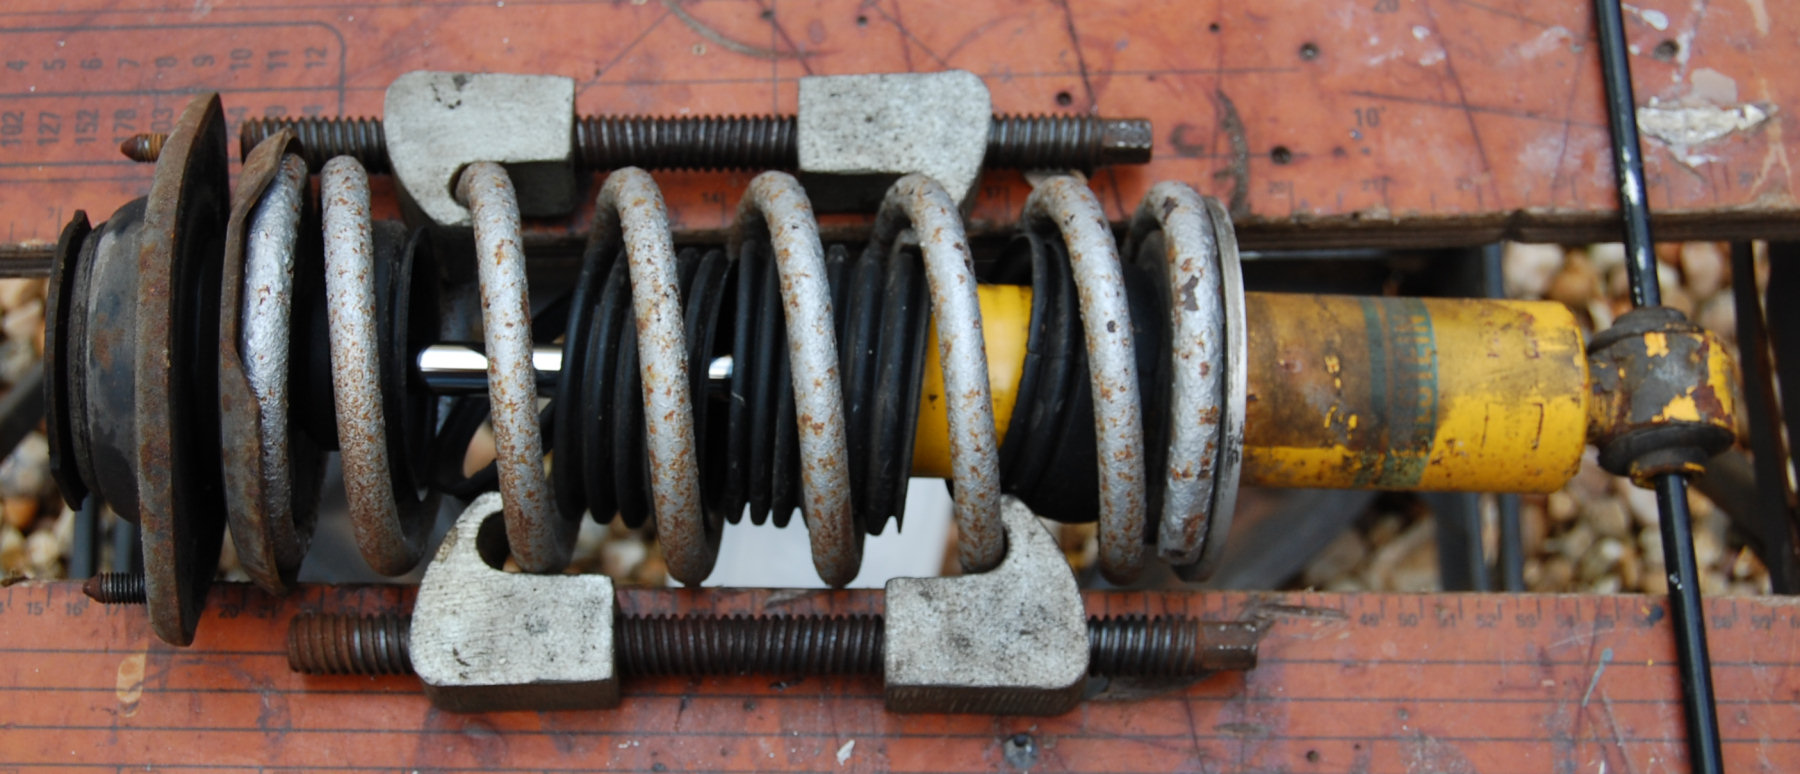
| We firstly need to attach some spring compressors and gently wind them in, alternating between them to compress the spring evenly. We did this on a work bench and the placed a metal bar through the lower end, to stop it rotating. You don't need to compress the spring by much, just enough to remove create a gap between the spring and the top spring plate. This photo shows a rear shock absorber. |
You can then undo the 14mm nut holding the shock absorber together.
Don't leave the springs under compression. Remove the spring compressor until you need to put the shock absorber back together. It is a good idea to measure the length of the open springs too. Both sides should be equal.
Once in pieces I went about cleaning up the springs with a powered wire brush and then treated them with a rust preventer.

| This is the rebuilt shock absorber all cleaned up and with new boot and bump stop fitted. I weighed this at 4.0Kg. |
Right Side
The right-hand side front shock absorber removal is very similar but there is less room for the upper A-arm bolt to be removed due to the air-conditioning pipework.
Torque Settings
- Shock absorber shaft nut = 23 to 34 ft/lb
- Shock absorber mount nuts = 22 to 27 ft/lb (32 Nm)
- Dog bone bolt = 27 to 40 ft/lb (45 Nm)
- Shock absorber lower bolt = 54 to 69 ft/lb (83 Nm)
- Wheel nuts = 105 Nm