
Changed the differential oil this morning. It's a fairly quick and easy job to do, once the car is up high enough to get to the drain and filler bolts. The car needs to be level though. Always take out the filler plug first, just in case you can't undo it and end up with an empty diff. Had a 15/16" socket which is a better fit for the supposedly 24mm drain plug and had to buy a 23mm socket for the filler plug. It helps if you have a lubricant pump too. There is a magnet on the drain plug to catch any odd bits of metal. Mine was pretty clean. I also filtered the oil as it came out to see if anything was caught but this too was clean. Both bolts are torqued to 39-54Nm (29-40 ft-lbs).
Spent the afternoon searching for the source of odd noises from the rear right of the car. The rear bumper was loose in places and the rear fog light was also rattling a bit. We also discovered a knocking noise from an exhaust hanger. There is definitely a graunching sound when turning right at around 30mph though. The wheel bearing is the primary suspect at the moment.
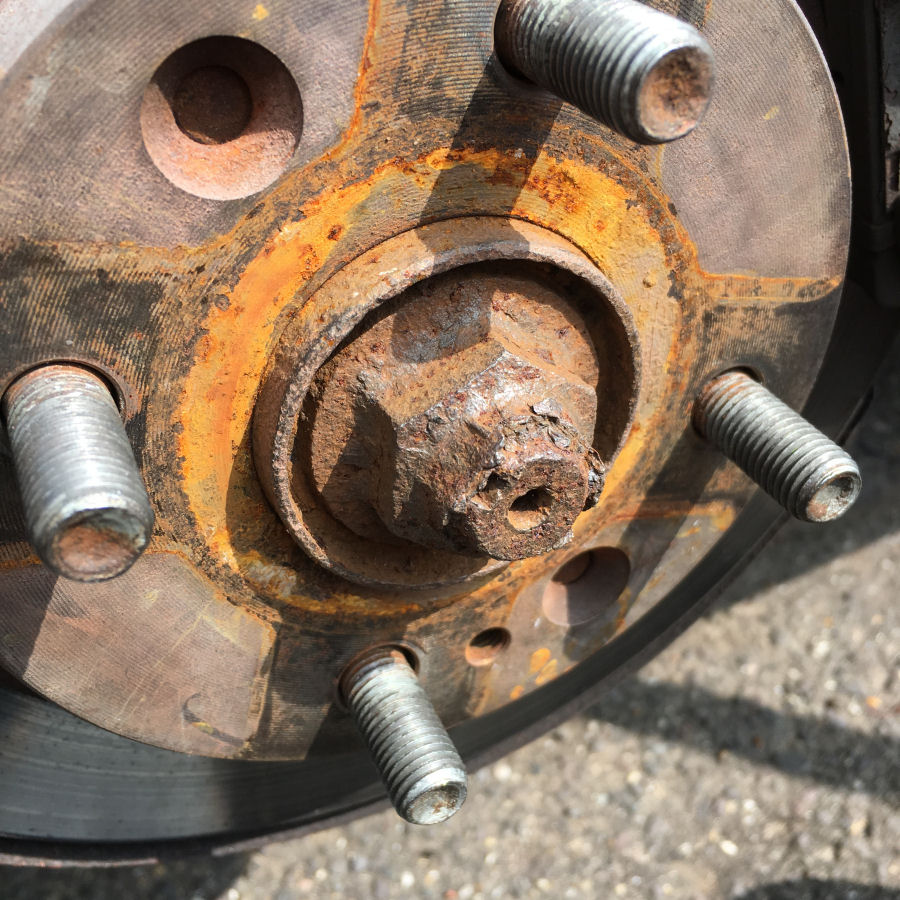
Replacing the wheel bearing is a job I might get done by a garage as it requires the right tools. A 29mm socket is required for the hub nut to start with. Removing the old bearing also requires a powerful press. The hub nut looks to be in a bit of a state!
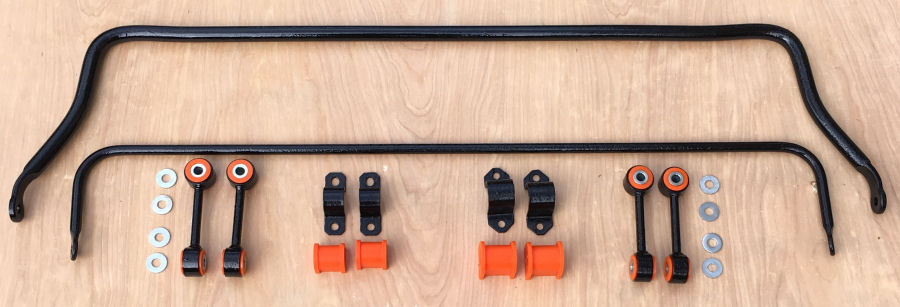
All the anti-roll bar bits are painted and ready to go back on the car.
After even more chasing down noises from the right rear side, we found the centre cap on the wheel was slightly loose. The boot lid was also vibrating slightly. Both fixed now but a further test drive showed the main noise was still there and getting worse. I'm now almost 100% sure it is the wheel bearing, so the car is booked in for next week to get this replaced. I don't have the tools to tackle this job myself.
Fitted the front anti-roll bar this morning. Threading it back through the pipework is challenging but wrapped it in foam first to stop it getting scratched.
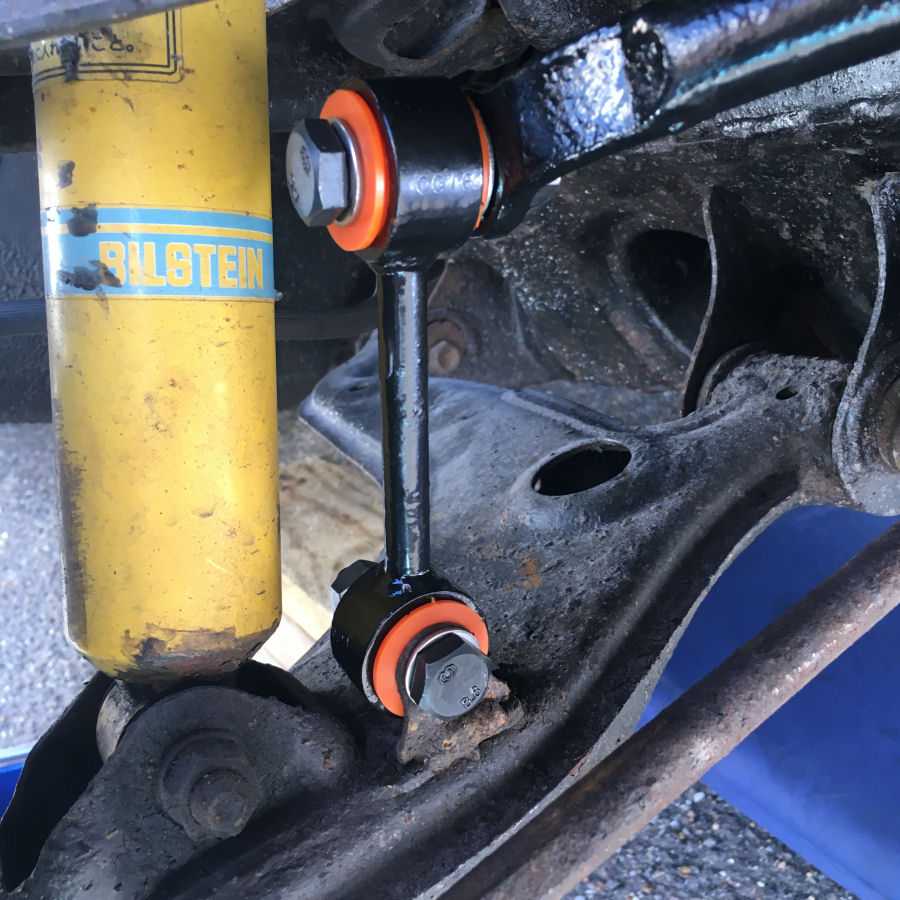
The drop links / dog links are easier to fit. I've used new bolts, washers and nuts.
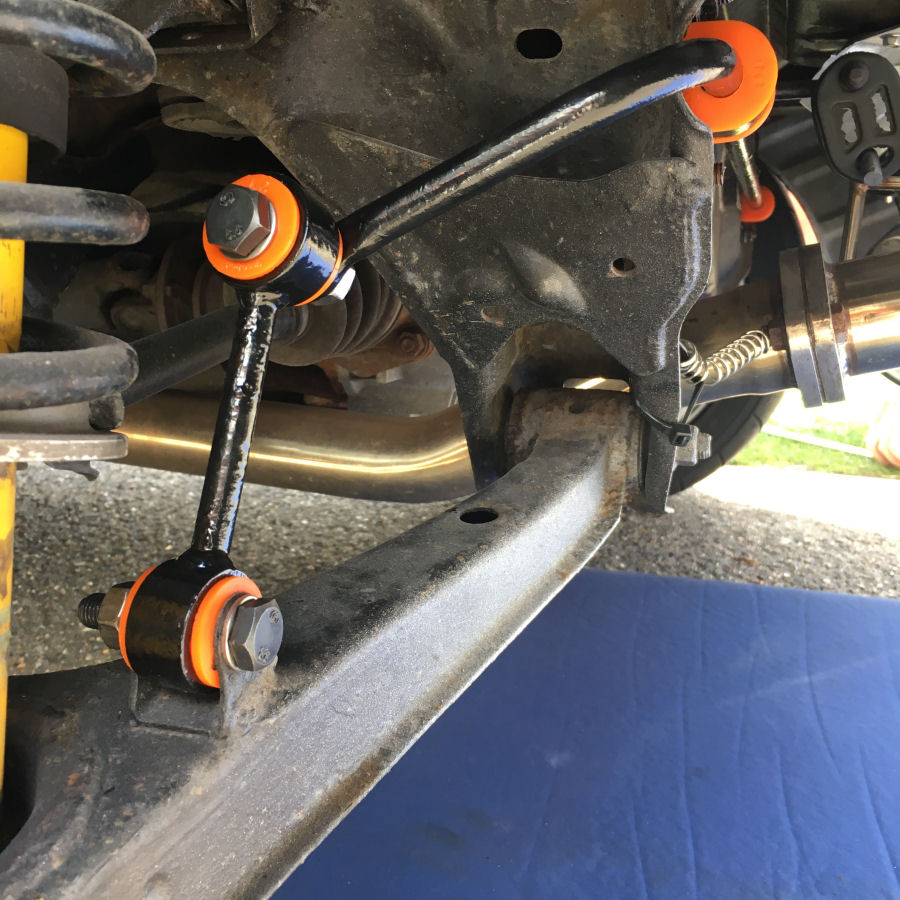
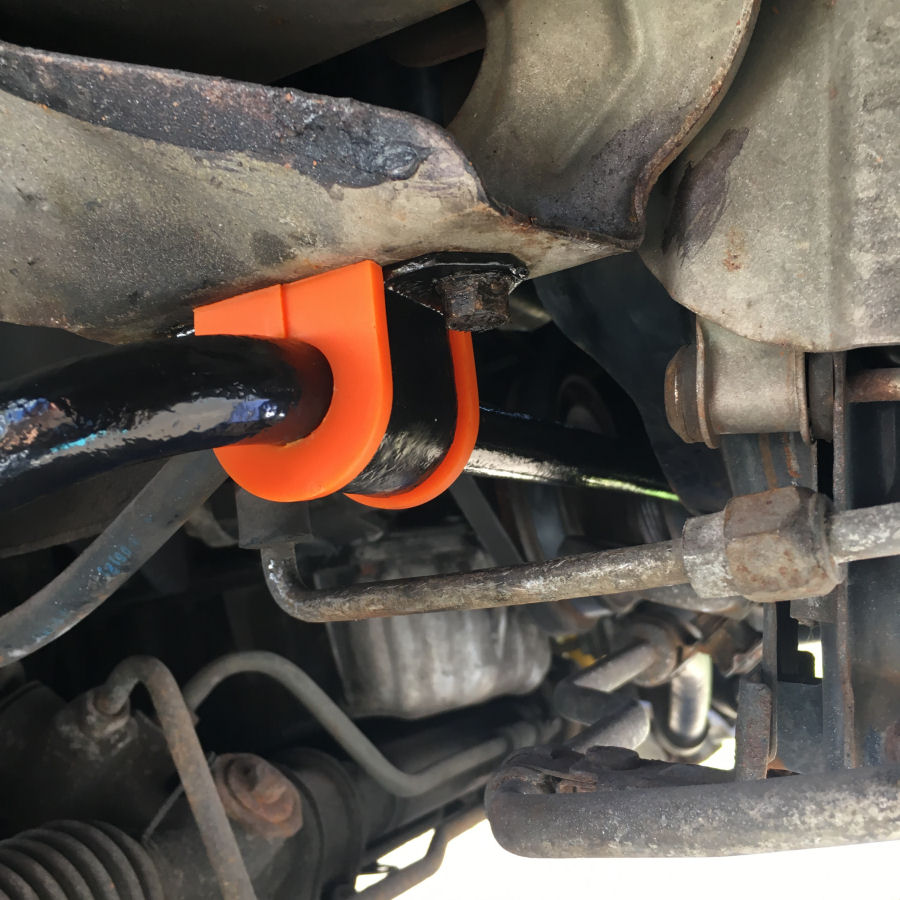
The rear anti-roll bar is much easier to fit as access is easier.
Dropped the car off this morning at Retro & Modern Automotive Ltd (was Suffolk Mazda) to have the wheel bearing replaced (driver's side rear). It was a difficult job apparently and the drive shaft also needed replacing.
Collected the car in the afternoon, but it didn't feel quite right, with a vibration coming through the transmission and the intermittent noise from the rear was still present on cornering. Whilst out on a test drive, the drive shaft failed at the inner CV joint, leaving no drive at all.
Trailered Yoko back to Retro & Modern Automotive Ltd (was Suffolk Mazda) this morning, to get the drive shaft replaced. Collected her later on and all seems good :-)
The strange, occasional pattering noise from the driver's side rear corner is still present on slow, sharp right corners :-( It seems to be speed dependent.
The indicators have stopped working. The #12 fuse (10A) has blown. When I replace it, it just blows again as soon as the indicators are used.
Whilst investigating under the dash, I noticed the driver's seat was slightly loose. Some of the bolts holding the seat in place have damaged threads, so these were replaced.
To resolve the non-working indicator issue, I started by disconnecting both the front and rear light units. Replaced the fuse and it didn't blow with the hazard lights switched on. Reconnected the rear light units and they worked OK. The problem was clearly with the 'stealth TSI' light units I fitted last year. The design is not brilliant and the positive to the indicator bulb was just a terminated piece of wire, through a metal washer, held roughly in place with a flimsy plastic washer. The metal washer had moved to short to ground. I modified both sides to avoid this issue occurring again.
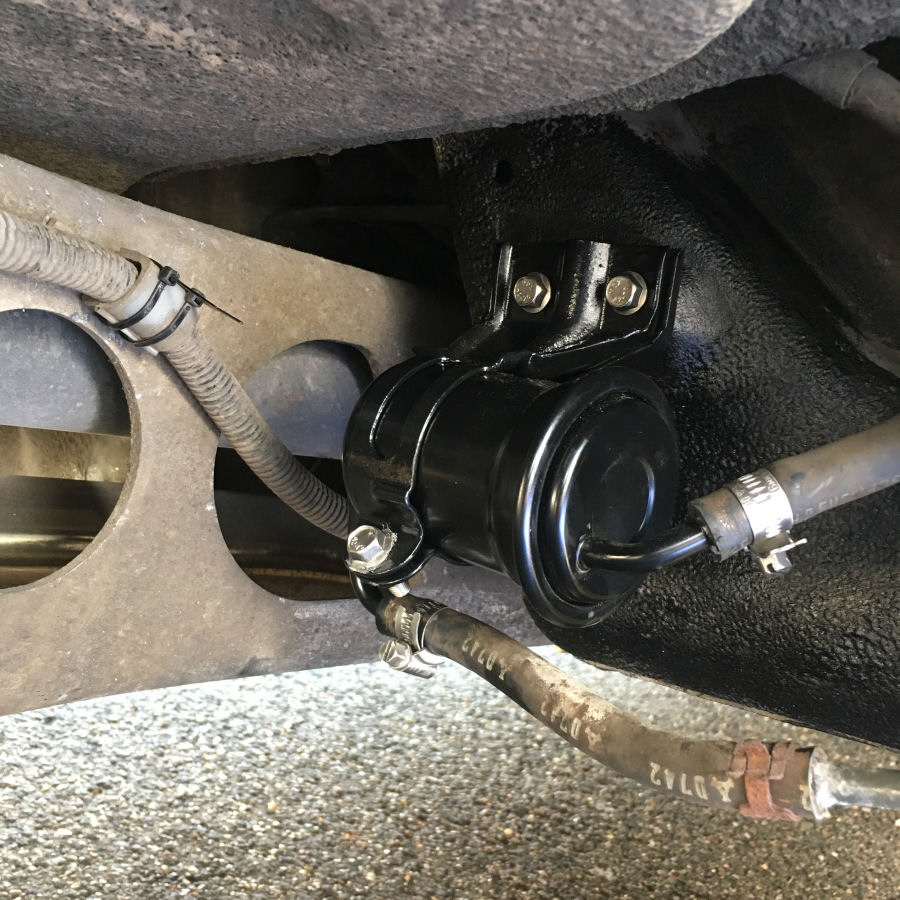
Further investigations on the strange noise from the rear right proceed. Removed the plastic cover in the front of the rear right wheel arch and also the plastic cover over the fuel filter. Nothing obvious wrong here but went for a test drive to see if these were the culprits. The answer is no.
Whilst I'd got these panels off, I cleaned up the underside of the car and removed the fuel filter bracket, to be cleaned and painted.
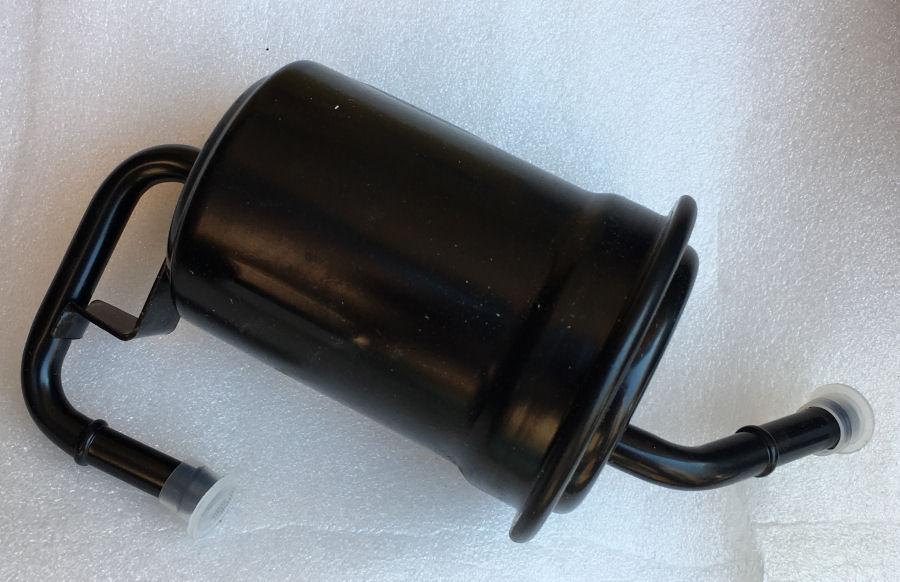
Fitted the new fuel filter by clamping the hoses either side of the old one first, to allow it to be removed without draining the tank all over the floor! Fitted new stainless-steel Jubilee clips.
Another suspect for the noise is now the brake caliper or brake pads. I removed the caliper but could find nothing obvious that would cause it.
To try and isolate the location of the noise, I fitted a Smartphone microphone on a lead inside the rear wheel arch and try to record our next test journey. This didn't work as everything was just too loud. I'm going to try again with the microphone in the boot.
Finally! We have removed to source of the noise. I'm not 100% sure what it was as we did lots of things at once in the rear right corner of the car. Firstly, we put stiffer exhaust hangers on the exhaust, to make sure it could move about as much. My Dad also found a small piece of plastic under the parcel shelf. I also tie-wrapped some cables near the battery and added some foam tape to a few plastic panels, to stop them vibrating. The noise has gone :-)
This is the new fuel filter fitted before I put the cover back on.
Currently working through a checklist of jobs before we take the car across to France for the Le Mans 24 race next month. The side stripes have been taken off to allow for the new graphics. We have installed a GoPro camera on a windscreen suction mount. We really don't seem to have much storage space in the boot, so my Dad is making a waterproof, external boot bag that can be strapped securely to the boot.
We don't have access to mains electricity whilst camping so I've installed a high power double USB charger. My new head unit also has a USB charging port.